Grass Wind Shader
I saw a cool stylized wind shader by a game developer on YouTube, PrismaticaDev. I highly recommend his channel.
He created this stretchy, satisfying wind shader and I wanted to recreate it for our film. Unfortunately, it never saw the light of day because it would’ve taken too much time to iterate with all of our batch renders, and it would be an element that would have to be consistent across nearly all shots within our film. It was just another one of the fun side projects I did that fell through the cracks.
This was my first dip into trying fun displacement shaders. The tutorial used Unreal Engine, but I was able to translate it in the language of Arnold shader nodes in Maya Hypershade. Iterating with a not realtime renderer significantly increased my development time and I spent way too much time tweaking the values just to even capture the overall motion, with tens of pushes to our render farm. I swear I’m not wasting our farm’s resources!
Not all Unreal Engine nodes had a direct equivalent in Arnold/default Maya shader nodes, but it was fun deciphering the underlying math of it all and helped me learn a lot. The creative layering of simple mathematical operations blew my mind! I also tried layering more features to make the grass field feel more dynamic overall.
Regardless, it baffles me how Hypershade has no way of organizing nodes, either with network boxes, node grouping, nor ability to redirect the wiring between nodes. It makes me appreciate the node system in Blender, Unreal, Unity, literally any other visual shading environment! My node network looks so abysmal, and is not something to be proud of.
This shader depends on three major elements: fake turbulence displacement, displacement of grass in the direction of the movement of the wind, layering of sine waves to construct a mask for the wind.
I won’t be covering the nitty gritty details, as he covers it in the video. I’ll mostly be describing my journey working to add features to the shader, which are going to be pretty standard. I’ll also work through the process of taking apart and putting together the different systems in Maya. For the most part, I pulled my hair out trying to work with the many Maya subsystems when I feel like data manipulation is so much easier in other programs like Houdini, heck, even Blender.
I used Maya MASH to instance geometry across a flat grid.
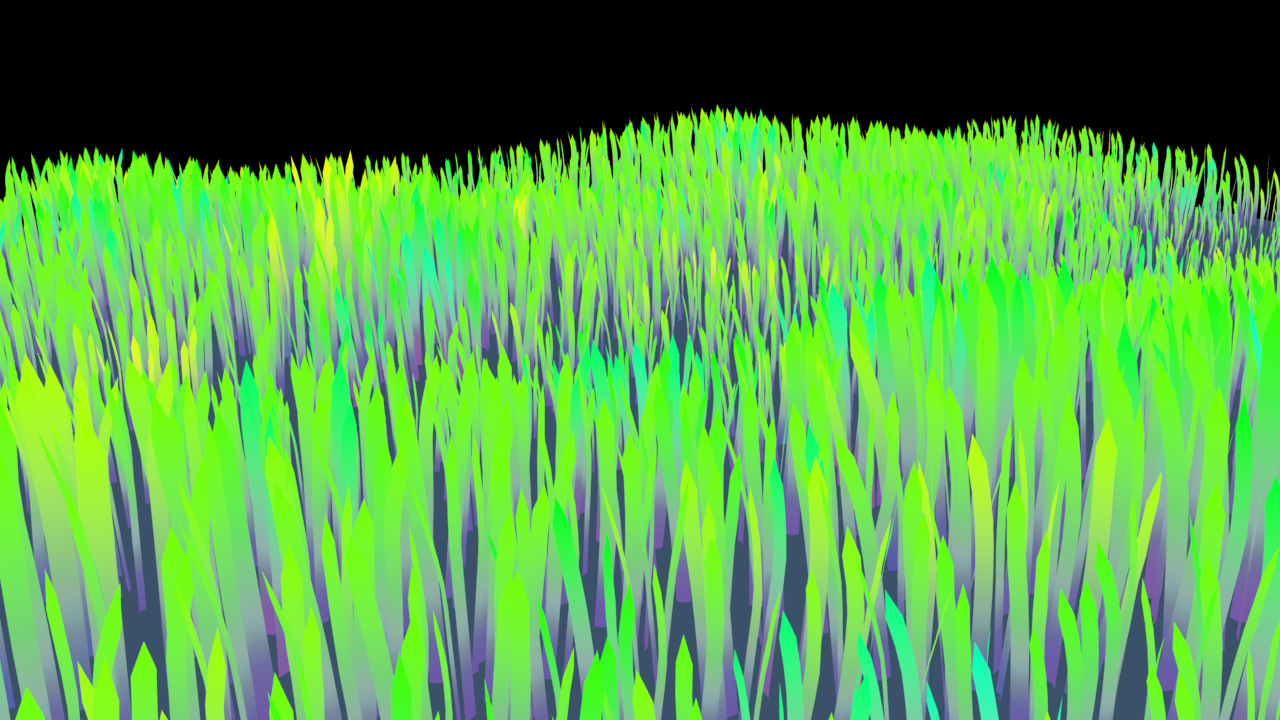
After many iterations, here were the results of my favorite settings after tweaking the turbulence and displacement settings:
Okay. I’m happy with the overall motion.
There were a couple points I wanted to expand upon:
Make the field look more organic. Different colors, different grass sizes.
I wasn’t happy with how you can see the uniform transition lines with the wind as the mask translates through space.
I decided to deal with issue (1) by working within Maya Bifrost Extension. I used a fractal noise field with a small frequency to drive both the point_scale of each grass clump and a hue shift, where larger clumps tend towards green-yellow, while smaller clumps leaned towards blue-green.
Pointscale was a default attribute when working with point instancing within Bifrost, but I created a custom hueshift attribute to output for an aiUserColorData node to drive a hue shift using aiColorCorrect, driven by the same field that drives the scale.
This is the reason I chose to test Bifrost is because I like the interface of working with attributes, and it is similar to Houdini, which I had more experience with.
I was not happy working with MASH and having to decipher what attributes can be worked with directly with the given nodes. The interface feels fussy to work with.
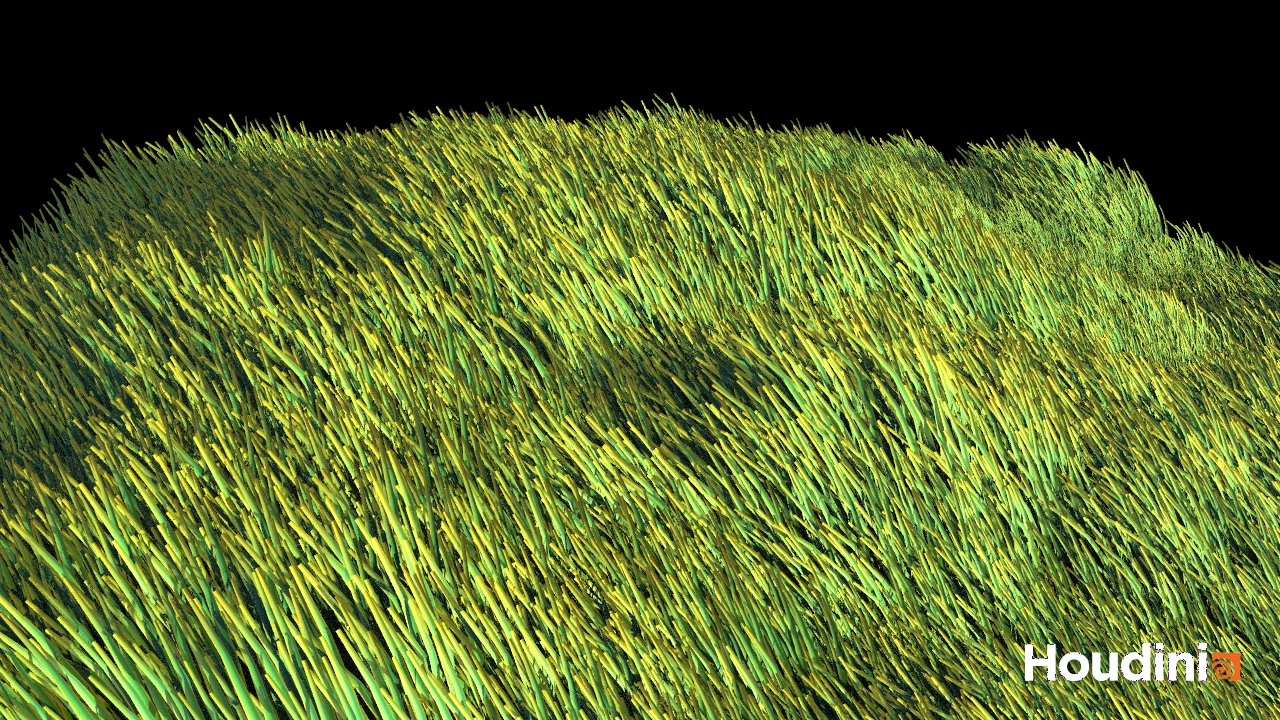
But after a bit of tweaking, here is the result:
Why are all the grass clumps moving uniformly? This is when I realized my grave mistake.
For at least the version of Bifrost on our lab computers, there is no default Bifrost node to convert Bifrost instances to geometry. The displacement shader doesn’t play nice with this. One of the solutions pointed to needing to download external compound (groups of nodes) packs, and a hacky way would be to loop over scattered points along the ground mesh and extract transformation and scale data. At this point, I already had a working version in MASH and it was going to save me time to just go back to the old system.
While I loved the direction this was going, I regretfully returned to MASH. If I have more time I would like to make it work within Bifrost, or work with a MASH Python node to feed in noise to drive color and scale instances. Looking at the docs, it gives access to position, scale, and id attributes. But for now, I just settled for random coloring and scale per clump to make it easier.
From here on out, I just continued layering on extra features.
To solve my critique on (2) mentioned above, I applied domain warping to the world space coordinates. I used a Worley noise that sampled world space with a small magnitude and frequency, and added this to the world position coordinate which is then fed into the rest of the shader operations. Quick and dirty.
Here is what it looks like with color.
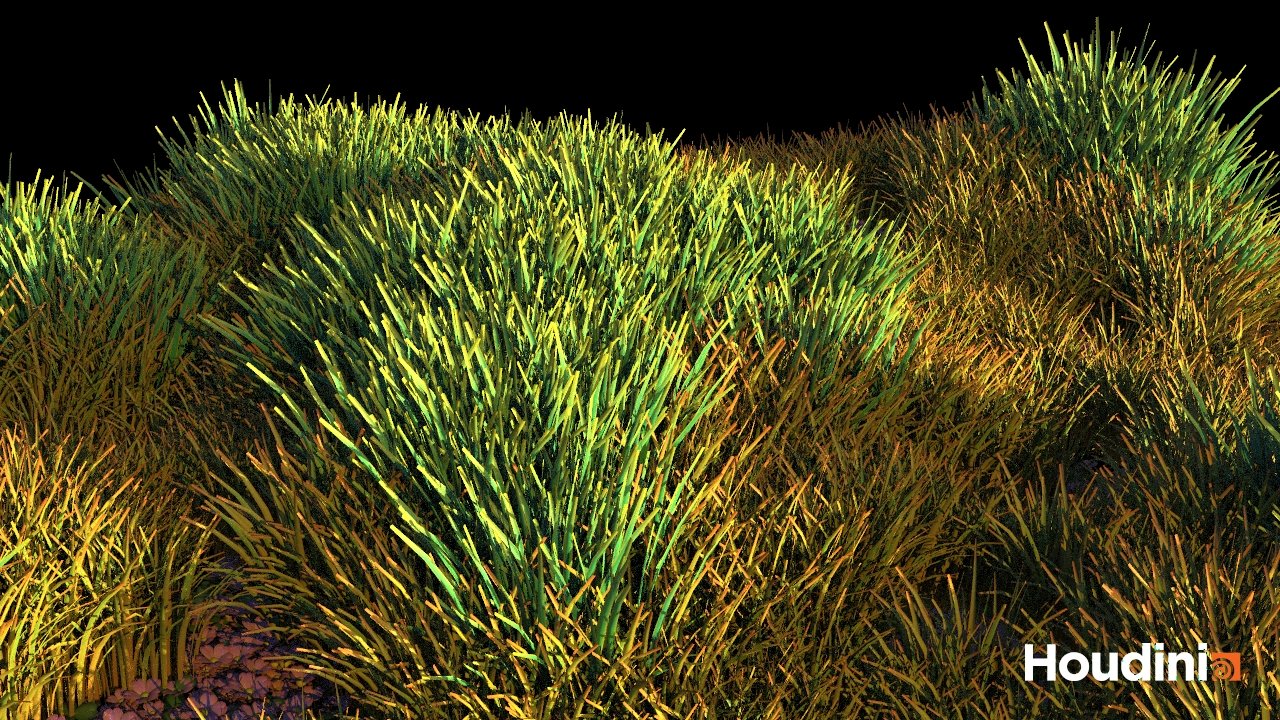
Then I applied a hue shift to the grass depending on if it is displaced. This was easy to do by extracting our mask then re-fitting it to an appropriate range for hue shifting.
Finally, I applied slight random color variation. This was accomplished by using a MASH Color node and extracting vertex coloring to be fed into the shader. I will be honest and say I spent a while figuring this out, when looking it up to find the specific operations required to accomplish controllable, random colors with the MASH interface to render with Arnold. This was much easier to figure out how to do with Bifrost.
I think I made the hue shift too impactful. I like the subtle color changes from the previous iteration better. I also would play around with the value and saturation of the colors. That’s something I would change if I were to re-render.
Otherwise, that’s all there is to it! I never knew working with grass could be so interesting. I watched another video on the grass in the video game, Ghosts of Tsushima, and it was a wonderful watch. I like the idea of defining grass blades with Bezier curves and using a vertex shader to construct a blade of grass with proper normals using the Bezier derivative. I have not studied the properties of Bezier curves in depth, and I would love to someday. Using a sine wave deformer for motion was also a treat, the resulting motion looked convincing.
I hand modeled the grass clumps for this demonstration, but working at a lower level with curves like in the Ghosts of Tsushima video would open a new world of dynamic animation. I love proceduralism.
One of the limitations of this displacement shader is that it is pretty funky if you’re not working with geometry that is strictly vertical. Due to the nature of the mask working in the x-z plane and sampling world space coordinates, horizontal geometry will stretch in weird ways, especially in harsh transitions of the mask. It also does not conserve the length of the grass blade. This may also be considered a stylistic choice.
I watched a neat environment Houdini video series by Rohen Dalvi where he constructs grass blades with a curve, then sweeps smaller curves along the curve to construct a plane mesh. The video instances tens of thousands of grasses with little flowers and clovers. I followed this tutorial and rendered it on my home computer, where I am too poor to pay for a license. I did not have the foresight to hue shift based on Houdini’s pscale attribute, which was driven by multiple noises. But here are some renders anyways since I have it on hand.

Grass is fun!
Extra resources if you want to try out this project for yourself:
The Unreal Engine shader material network
Other resources mentioned in the blog: